 LapBeepsLapBeeps
Build guide
A Raspberry Pi, an RTL-SDR and a weatherproof box: everything you need to leave a permanent, headless timing appliance at the track — from a blank SD card to a finished enclosure.
Part 1
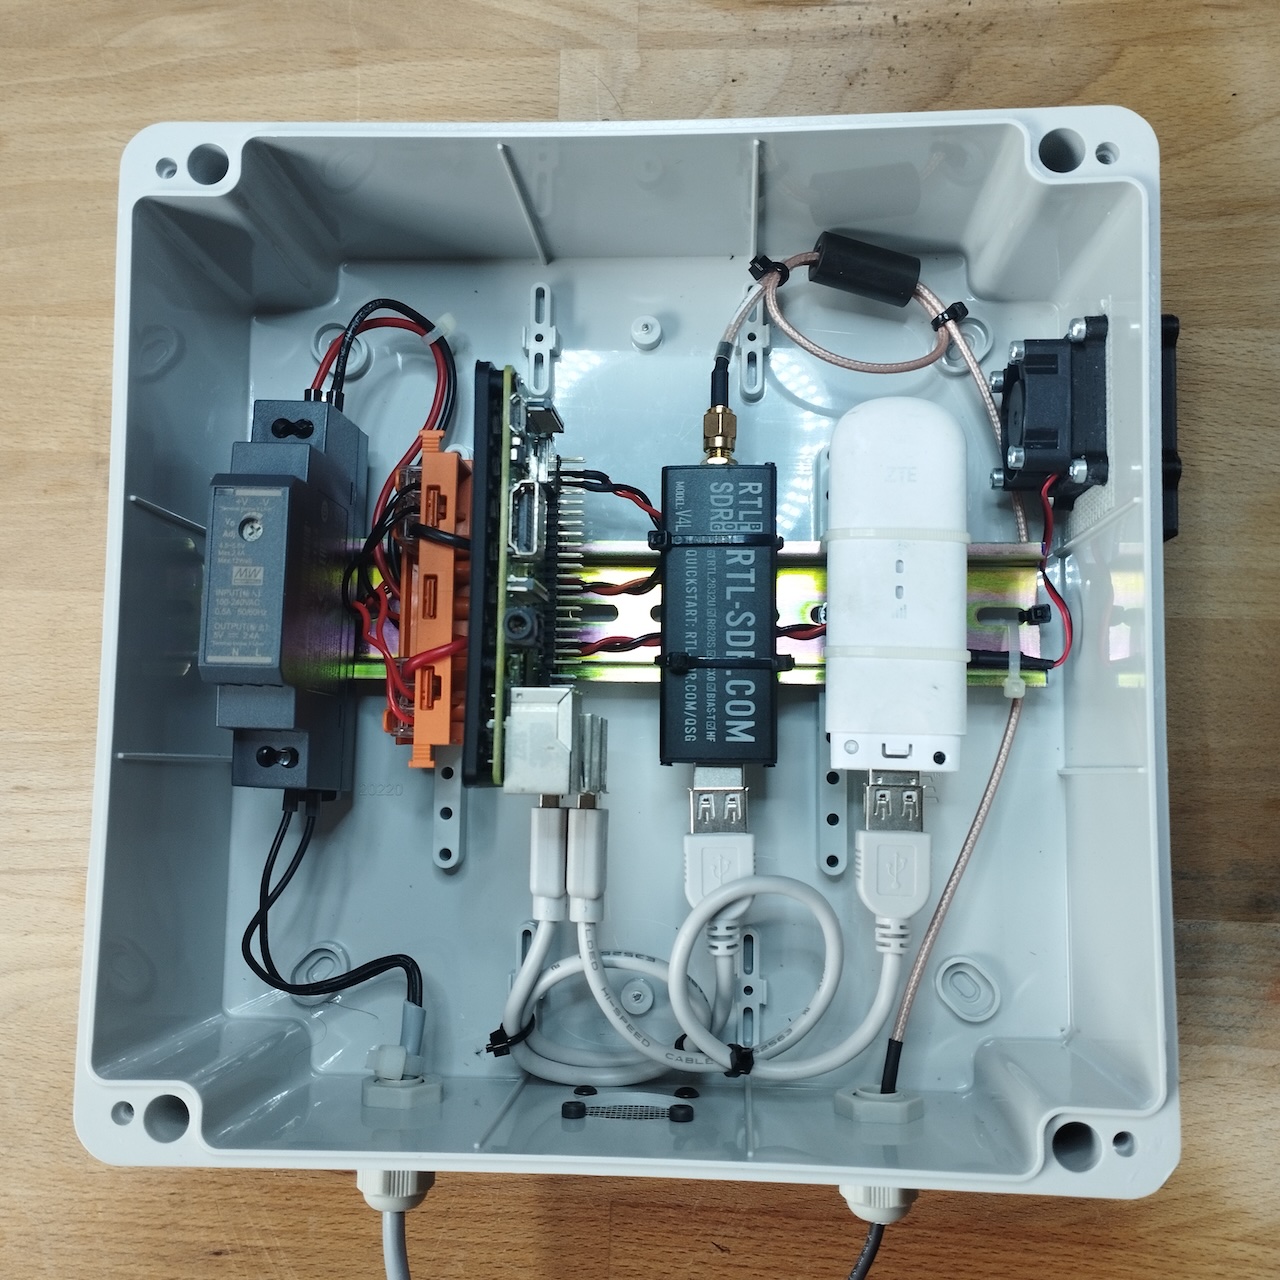
Everything below builds one weatherproof, DIN-rail-mounted box that survives outdoors and needs nothing but a mains cable. Keeping the Pi indoors? Skip the enclosure and ventilation steps and go straight to powering it.
A sealed enclosure in direct sun cooks both the Raspberry Pi and the RTL-SDR. If the box will sit outside year-round, cut a vented panel into one side and fit a printed grille to keep rain and bugs out while air moves through. The 3D-printable files for the grille and mounting bracket are here: 3D printable ventilation files.
Clip the DIN-rail power supply onto the rail. There are rail-mountable power outlets as well (then you can use a Raspberry Pi Power Supply).
As I'm using an 5V fan to aid cooling of the housing, I use terminal blocks to distribute the power nicely.
Use min. 1 mm2 wires for powering the Raspberry. For multi-strand wires, the use of ferrues (metal sleeves) are recommended. They keep the individual strands together, prevent fraying, and provide a more reliable connection in screw terminals. They also reduce the risk of loose strands causing short circuits and improve the mechanical strength and consistency of the connection.
The 210x210x90 mm enclosure would fit a 90-deg USB connector to power the Pi. Rather than a USB power adapter, I feed the 5V from the terminal block straight into the Pi's GPIO header (5V and GND) — it skips the USB connector entirely, which is one less thing to work loose. Mount the Pi itself on a DIN rail mount for the Raspberry Pi on the same rail as the power supply.
Raspberry pinout image source: freesvg.org.
Using the 3d-printable DIN-rail anymount, you can secure both the RTL-SDR and the LTE modem to the DIN rail.
Plug the RTL-SDR dongle and, if you're using one, the LTE modem into the Pi's USB ports, and fix both in place so nothing dangles or pulls on the connector once the lid goes on.
With the power supply, terminal block, Pi, SDR and modem all mounted and wired, close it up, run the antenna and loop cables out through a cable gland, and it's ready to leave at the track.
Part 2
Everything below runs from a terminal over SSH — no monitor or keyboard needed at the track.
Using the Raspberry Pi Imager, flash Raspberry Pi OS Lite — the build with no desktop environment. The appliance is configured entirely from a browser on another device, so a desktop GUI would only slow down boot and waste RAM. In the imager's settings (the gear icon), it's worth pre-configuring the hostname, enabling SSH, and setting Wi-Fi/locale before writing the image.
Boot the Pi, SSH in, and bring the base OS up to date before installing anything:
sudo apt-get update
sudo apt-get upgradeAdd the LapBeeps package repository, then install OpenStint(the decoder) and the headless build of LapBeeps in one go:
echo 'deb [trusted=yes arch=arm64] https://repo.lapbeeps.com/apt/ /' | sudo tee /etc/apt/sources.list.d/openstint.list
sudo apt update
sudo apt install openstint lapbeepsReboot if the installer asks for it — both services start automatically from here on. If OpenStint doesn't pick up the SDR dongle right away, walk through the official OpenStint Raspberry Pi setup tutorial.
From any browser on the same network, open [hostname].local:8080 — the hostname set back in step 1. Set the track's minimum and maximum lap times, which filters out noise and false triggers, then enable streaming so practice sessions publish on their own without anyone touching the box again.